sMobile ? "width=device-width,initial-scale=1.0,minimum-scale=1.0,maximum-scale=1.0" : "width=1100"' name='viewport'/> android xda: Asus Zenfone Tutorials
Showing posts with label Asus Zenfone Tutorials. Show all posts

Friday, 11 November 2016

How To Update Asus Zenfone 2 Selfie Or Laser To Android 7.0 Nougat

Hey guys do you want to update Asus Zenfone 2 Selfie or Laser to Android7.0 Nougat? Then you can flash the official CM14.1 ROM that brings the latest Google's mobile operating system version to your beloved device.
Advertisements.

On this post you will be guided completely to flash the CM14.1 ROM based on Android 7.0 Nougat on either Asus Zenfone 2 Laser or Selfie. Prepare everything required before going. One more thing, your device's warranty will be nullified for flashing the custom ROM like this.

Before we begin to the tutorials it's recommended for you to firstly read the following preconditions.

How To Update Asus Zenfone 2 Selfie Or Laser To Android Nougat 7.0 Nougat
Preconditions.
  • You already unlocked your Asus ZenFone 2 Laser or Selfie bootloader.
  • You need to have installed TWRP to your device.
  • Then enable USB debugging mode.
  • Make backup now.
  • Follow the entire guides without skipping anything.
  • Your device's warranty will be voided
  • Remember that all the risks are yours to bear.
Advertisements.

How to update Asus Zenfone 2 Selfie or Laser to CM14.1 Android 7.0 Nougat ROM

Your warranty will be voided. Perform the guides below and all the risks are yours to take.
  1. Download the CM14 for Asus Zenfone 2 Laser / Selfie to your PC.
  2. Now you need to use your USB cable to connect your device to PC. Once they're connected then transfer all the zip files to your device's SD card.
  3. Now power off your Asus Zenfone 2 Laser / Selfie phone then unplug it from USB cable.
  4. Now enter to the recovery mode.
  5. Inside the TWRP mode, perform the following action full data wipe by choosing the Wipe button -> Swipe to Factory Reset button.
    Wipe Data TWRP Recovery Android
    Wipe TWRP Recovery
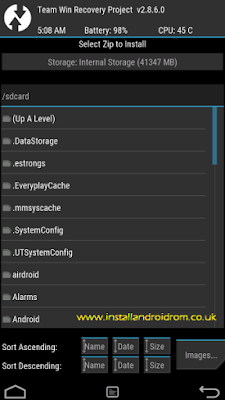
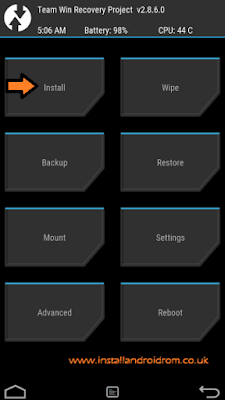
  6. Now back to the TWRP main menu then you need to tap the Install button. And then choose the ROM zip file you previously transferred to your device's storage on step 2.
    Install Button TWRP Recovery Android
    Choose Zip File TWRP Recovery
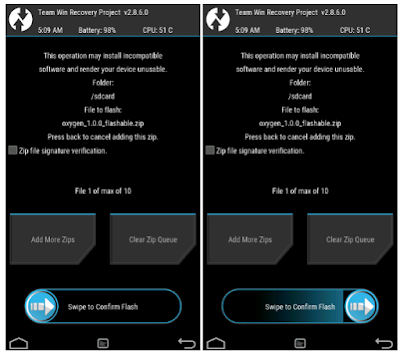
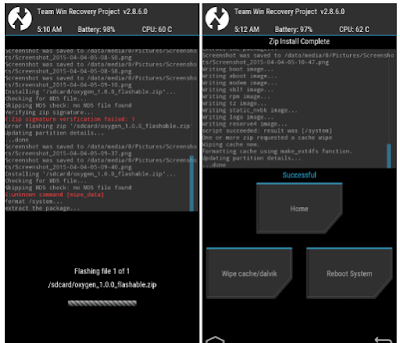
  7. Now confirm the installation by simply swiping the Swipe to Confirm Flash option. You will see the installation will begin.
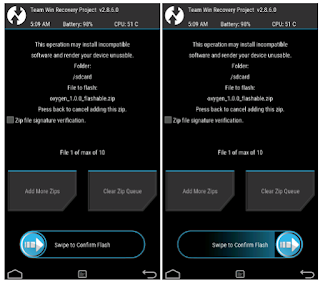
    Swipe To Confirm
    TWRP Finished Install
  8. Now you need to tap Wipe cache/dalvik button in case you experience bootloop or other technical problem.
  9. Now you need to tap the Reboot System button.
    TWRP Reboot System
  10. Done.
That's it you have successfully updated your Asus ZenFone 2 Laser / Selfie to Android 7.0 Nougat with CM14.1 ROM.

Sunday, 4 September 2016

Install Android 7.0 Nougat On Asus Transformer TF300T

How to Install Android 7.0 Nougat on Asus Transformer TF300T is a great Android based tablet armed with Nvidia Tegra 3 T30L chipset and Quad-core 1.2 GHz Cortex-A9 CPU.
Advertisements.

But unfortunately the superb tablet is reported will not be getting the official Android Nougat update. That is of course a sad news for those who probably have been expecting the update will available for the device.

But please do not let the situation upsetting you, because there is a hope to bring the latest and sophisticated Android version to the device.

Because the Nougat can still be installed on your device using the custom ROm developed by XDA senior member Timduru. Timduru made the RO based on AOSP Nougat. You will experience the same Nougat along with the features added by the developer.

If you are interested, then you are invited to flashed the RO on your device. Oke?

KatKiss ROM KatKiss ROM
Requirements.
Note. Proceed to the ROM flashing guides but keep in mind that all the risks which may happen during or after the process are yours to bear. Blame none but yourself. One more thing, if your device warranty is still valid, then it will probably be voided.
Advertisements.


Installing this ROM is similar like installing any other ROMs, as long as your device's already powered with TWRP custom recovery.

Instructions.
  1. Download the custom ROM above to your computer and then transfer the file to your device's internal storage.
  2. Once done, boot your Nexus 5 into the TWRP recovery.
  3. Press and hold Volume Down, Volume UP and Power buttons together. Release the buttons once you see Fastboot / Bootloader Mode. Use Volume keys to change START to recovery mode.
  4. Inside TWRP recovery, choose Wipe and then Swipe to Factory Reset that's on bottom screen.
    Note. Make sure you have backups before performing this action.
  5. Back to TWRP main interface to select Install then pick the custom ROMs .zip file your previously transferred from PC.
  6. Once the zip file selected just perform Swipe to Confirm Flash to start the flashing process.
  7. After TWRP has finished flashing the ROM, then you will find and choose Wipe cache/dalvik option and do Swipe to wipe from the screen.
  8. Finally when the cache and dalvik wipe finishes, choose Back button appears on screen to further selecting the “Reboot System” button.
That's it guys. You can enjoy the ROM. Please to give your feedback to the official ROM's thread on XDA site.