sMobile ? "width=device-width,initial-scale=1.0,minimum-scale=1.0,maximum-scale=1.0" : "width=1100"' name='viewport'/> android xda: linux
Showing posts with label linux. Show all posts

Friday, 19 December 2014

How to Unroot Nexus 6! Windows/Mac/Linux/Ubuntu

Check Out How to Unroot Nexus 6 on Windows Video Below!
Check Out How to Unroot Nexus 6 on Mac Video Below!

Need to restore the Nexus 6 back to complete factory stock, just like the day you first bought it? This is the ultimate guide to getting the Nexus 6 back to stock factory standards. Once you have finished the guide the Nexus 6 will be safe enough to send back to the manufacture/carrier without any issues! 

This guide will completely remove any signs of root, custom recovery, modding, and will even unbrick the Nexus 6 and remove any and all personal information!


Note: This will remove all personal information from the Nexus 6! Backup any and all important information that you don't want to lose!!


Follow the guide below to completely unroot the Nexus 6!


1. Power off the Nexus 6.


2. Press and hold the power button and volume down button at the same time until you see a green "Start" on the screen.


3. Plug in your phone via microUSB.


4. Download and unzip UnrootNexus6.zip using the download link below. 


Download UnrootNexus6.zip


5. Move the unzipped folder "UnrootNexus6" to your desktop!


If your on Mac/Linux/Ubuntu skip step 6!


6. Open up "Device Manager" on your Windows computer. If you see "Android USB Devices" with a yellow triangle next to it install the drivers that are included in the UnrootNexus6 folder. If you see "Android Single ADB Interface" in the drop down tab with no yellow triangle move to step 7. 


7. Open Command Prompt on Windows or Terminal for Mac/Linux/Ubuntu. Follow the commands below and press enter after each line: 


Windows:

cd Desktop
cd UnrootNexus6
fastboot flash bootloader bootloader-shamu-moto-apq8084-71.05.img
fastboot reboot-bootloader
fastboot flash radio radio-shamu-d4.0-9625-02.55.04.img
fastboot reboot-bootloader
fastboot flash system system.img
fastboot flash userdata userdata.img
fastboot flash boot boot.img
fastboot flash recovery recovery.img
fastboot erase cache
fastboot flash cache cache.img
fastboot oem lock

Mac:

cd Desktop
cd UnrootNexus6
./fastboot-mac flash bootloader bootloader-shamu-moto-apq8084-71.05.img
./fastboot-mac reboot-bootloader
./fastboot-mac flash radio radio-shamu-d4.0-9625-02.55.04.img
./fastboot-mac reboot-bootloader
./fastboot-mac flash system system.img
./fastboot-mac flash userdata userdata.img
./fastboot-mac flash boot boot.img
./fastboot-mac flash recovery recovery.img
./fastboot-mac erase cache
./fastboot-mac flash cache cache.img
./fastboot-mac oem lock

Linux/Ubuntu:

cd Desktop
cd UnrootNexus6
./fastboot-linux flash bootloader bootloader-shamu-moto-apq8084-71.05.img
./fastboot-linux reboot-bootloader
./fastboot-linux flash radio radio-shamu-d4.0-9625-02.55.04.img
./fastboot-linux reboot-bootloader
./fastboot-linux flash system system.img
./fastboot-linux flash userdata userdata.img
./fastboot-linux flash boot boot.img
./fastboot-linux flash recovery recovery.img
./fastboot-linux erase cache
./fastboot-linux flash cache cache.img
./fastboot-linux oem lock


8. Unplug your phone and press the volume down up you see "Recovery mode". Then press the power button. 


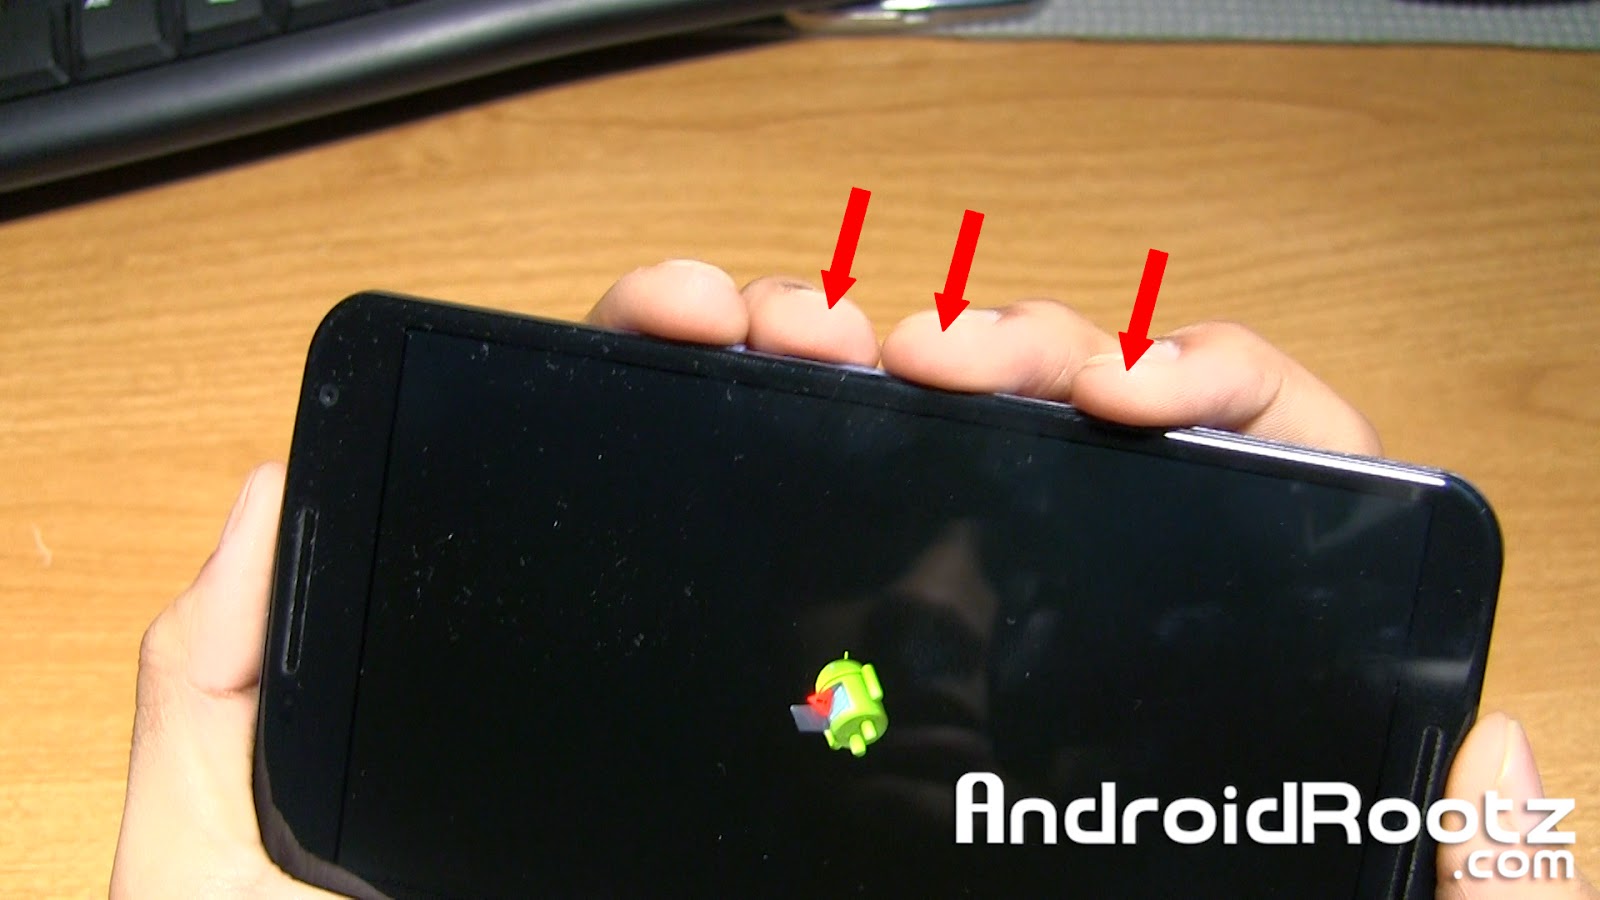
9. You might see a Android figure laying down with a red triangle. To fix this press the volume up, down, and power button at the same time for 5 or 6 times in a row until you see text on the screen. 


10. Once you see text on the screen navigate down to "wipe data/factory reset" and select "Yes -- delete all user data". You can navigate by using the volume up/down and power button. This will take about 5 minutes, be patient!


11. Navigate to "wipe cache partition" and select it. 


12. Lastly, select "reboot system now".


13. Now your phone will fully boot up with the setup screen, just like the day you first bought the Nexus 6! All signs of rooting, ROMS, custom recoveries, or modding has been completely removed!


FAQ:

Q: I just finished the last step, is it safe enough to send back to the manufacture/carrier?
A: Yes, completely! You have fully unrooted the Nexus 6 and locked your bootloader, you're good to go!
-----------------------------------------------------------------------------------------------------------------------------
Need Help With Your Android Device? Follow Me / Add Me / Like Me 
Twitter 
Facebook 
Google Plus
-----------------------------------------------------------------------------------------------------------------------------
Check Out Our YouTube Channel For More Great Guides! 
YouTube and Subscribe
-----------------------------------------------------------------------------------------------------------------------------

Thursday, 18 December 2014

How to Root Nexus 6! [Windows/Mac/Linux/Ubuntu]

Check Out How to Root Nexus 6 on Windows Video Below!
Check Out How to Root Nexus 6 on Mac Video Below!

While Google keeps adding features that makes rooting less and less of a necessity there are still a TON of features that you can only access if you're rooted. Luckily for us rooting a Nexus 6 isn't too much of a hassle since Google doesn't mind users messing around with their device, go Google!

Rooting the Nexus 6 will open a whole new world for your Android device. You will have access to custom ROMS, MODS, and great root apps like Titanium Backup! With just a few commands your Nexus 6 will be rooted!

Warning: This will remove ALL information on your Nexus 6! Backup any important information!!

Follow the guide below to root the Nexus 6!

1. Go into Settings > About phone and tap on "Build number" 5 for 6 times until it says "You are now a developer!".


2. Press the back button once and choose "Developer options" and make sure that "Enable OEM unlock" is check marked.


3. Power off your phone.


4. Press and hold the power button and volume down button at the same time until you see a green "Start" on the screen.


5. Plug in your phone to your computer via microUSB.


6. Download and unzip RootNexus6.zip using the download link below. Move the folder to your desktop!

Download RootNexus6.zip


Skip step 7 if you're on Mac/Linux/Ubuntu!

7. Open up "Device Manager" on your Windows computer. If you see "Android USB Devices" with a yellow triangle next to it install the drivers that are included in the RootNexus6 folder. If you see "Android Single ADB Interface" in the drop down tab with no yellow triangle move to the next step.

If you don't know how to install the USB drivers Google search it!


8. Open Command Prompt on Windows or Terminal for Mac and Linux/Ubuntu computers. Type the command below and press enter after each line: 

Windows: 
cd Desktop
cd RootNexus6
fastboot oem unlock

Mac:
cd Desktop
cd RootNexus6
./fastboot-mac oem unlock

Linux/Ubuntu:
cd Desktop
cd RootNexus6
./fastboot-linux oem unlock


9. The Nexus 6 should now display "Unlock bootloader?". Select "Yes" and then press the power button.


10. Press the power button again and your device will now automatically reboot. This boot will take a few minutes since it just did a factory reset! Once it's fully booted up you can setup your phone.


11. Connect the Nexus 6 to your computer and transfer "UPDATE-SuperSU-v2.40.zip". This zip file is located in the RootNexus6 folder. 

Mac users can use Android File Transfer to transfer the zip file to the Nexus 6.


12. Enter back into Bootloader mode. Repeat steps 3-5.


If your on Mac/Linux/Ubuntu skip step 13. 

13. Open up "Device Manager" again and if you don't see "Android Single ADB Interface" repeat step 7.


14. Go back to Command Prompt or Terminal and type in this command and press enter after each line. 

Windows: 
fastboot flash recovery openrecovery-twrp-2.8.2.0-shamu.img

Mac:
./fastboot-mac flash recovery openrecovery-twrp-2.8.2.0-shamu.img

Linux/Ubuntu:
./fastboot-linux flash recovery openrecovery-twrp-2.8.2.0-shamu.img


15. We're almost done! On the Nexus 6 keep pressing the volume down until you see "Recovery mode" and then press the power button.


16. You will now see a screen with options like "Install", "Wipe", "Backup", etc. Go ahead and select "Install".


17. Scroll down and select "UPDATE-SuperSU-v2.40.zip".


18. Slide your finger to confirm the installation.


19. Now select "Reboot System" and wait until the device is done booting up. Congrats, you just rooted your Nexus 6!


If you look in your app drawer you will see an app called SuperSU. You can confirm that you have root by installing an app like Titanium Backup and see if you get Superuser request, if you do then your rooted!


FAQ:
Q: Will I be able to install custom ROMS and use root apps after I complete the guide?
A: Yes, you will be allowed to install compatible Nexus 6 custom ROMS and use root apps too! Cool, huh?

-----------------------------------------------------------------------------------------------------------------------------
Need Help With Your Android Device? Follow Me / Add Me / Like Me 
Twitter 
Facebook 
Google Plus
-----------------------------------------------------------------------------------------------------------------------------
Check Out Our YouTube Channel For More Great Guides! 
YouTube and Subscribe
-----------------------------------------------------------------------------------------------------------------------------

Friday, 13 June 2014

Linux Screen Recording Just Got Quicker and Easier with ScreenStudio

Recording screencasts on a Linux system historically never has been a lot of fun. If you wanted good performance, you would usually record the screen using a terminal command. If you wanted ease of use, you would probably use a tool like gtkRecordMyDesktop or Kazam, a similar Linux screencast tool. Kazam worked for some people but I always had problems with it myself.
Finally, there’s a new screencaster that offers good performance, has lots of settings to choose from, and has a good interface to configure it all. Take a look at ScreenStudio and see for yourself.

About ScreenStudio

ScreenStudio is a screencasting application that is Java-based, which makes it very easy to run on any distribution. The only dependency besides Java is that your computer has “avconv” installed, which you should be able to find with ease using your respective package manager. Ubuntu users can install it by running the terminal command:
sudo apt-get install libav-tools
Fedora users can run the terminal command:
sudo yum install libav-tools

Record to File

ScreenStudio is an application which tries to be a very useful screencasting tool, and although it’s still aiming to add lots of features, it’s proving to be effective already.

screenstudio record   Linux Screen Recording Just Got Quicker and Easier with ScreenStudio

Of course, with ScreenStudio you’ll be able to record to a file in either FLV or MP4 format. You can also choose between different profiles that can change various parameters for size and quality. It’s pretty simple to figure out and use, really, which is good.

Stream to Service

screenstudio stream   Linux Screen Recording Just Got Quicker and Easier with ScreenStudio

If you don’t want to record your screencast to a file, that’s fine too. Over in a different tab, you have the option to stream to a service like Twitch.TV (learn more about streaming live video to Twitch.tv), UStream (read about Ustream video streaming), or YouTube Live directly. To make this work, you’ll need to configure the server, profile, and stream key so that the server knows which stream to associate your screencast with. It works surprisingly well, assuming that you have a good enough Internet connection to support streaming.

Overlay

screenstudio overlay   Linux Screen Recording Just Got Quicker and Easier with ScreenStudio

No matter if you’re recording to a file or streaming, you can add some customization to your screencast with an overlay. You can add a text overlay, or you can add your webcam’s video stream as the overlay. This is fantastic for screencasts because viewers can then see what you’re doing on screen as well as see you as you’re talking to them. A lot of people tend to add the overlay on later in post-production, but ScreenStudio does this all in one go, and makes it very easy to set up.

Sources

screenstudio sources   Linux Screen Recording Just Got Quicker and Easier with ScreenStudio

Of course, you can also choose between a few other setings, such as which screen you want to record if there are multiple screens, and at how many frames per second it should record. In the same view you can also configure the webcam and choose the desired resolution for use in the overlay.

Miscellaneous

ScreenStudio is being worked on heavily by developer Patrick Balleux. So it’s no surprise when I say that new versions of ScreenStudio are coming out at a rapid pace, and it’s important to check the project’s page on a regular basis for the newest version. Also, if you need any help using ScreenStudio, or just need some creative ideas, Patrick has a bunch of ScreenStudio tutorial videos available on his YouTube channel in the ScreenStudio playlist.

ScreenStudio Screencasting

ScreenStudio is a simple program for a seemingly simple task. However, that task is often a lot more involved than you might think, and ScreenStudio makes it very easy to accomplish a lot when it comes to screencasting. It’s still a relatively recent project, so I’m very excited to see where the application will go in terms of features. While it’s currently nifty, it’s not quite yet a must-have; but I wouldn’t be surprised if that changed in the future.

Have you tried to screencast in Linux? What was your experience? Can you share your setups? Let us know in the comments!