TWRP is offering the more and bigger abilities that the stock recovery is unable, you can perform the whole backups to your device, you can root your device by flashing the zip file of rooting package, you can also install all the great modified ROM such as CM, AOSP, AICP, crDroid and more.
Advertisements.
If you are interested then you can proceed to the tutorials to deliver the TWRP recovery on your Google Pixel device. Anyway the TWRP here is in 3.0.2 version. It's the newest one comes with several awesome things.
Preconditions.
- Of course you will need to firstly make necessary backups over all the data you regard important.
- Do not forget to enable your USB debugging mode. (How to enable USB debugging mode on Android).
- Follow the online tuition from here only if your device is Google Pixel guys.
- Be sure that your Google Pixel's bootloader is already unlocked to perform the guides from here. Learn the full instructions on how to unlock bootloader of Google Pixel and Pixel XL.
- Prepare everything needed, what's that? Your computer and a USB cable.
- Do not skip any steps just follow them all entirely.
How to install TWRP 3.0.2 recovery on Google Pixel
Perform the instructions from this post but all the possible risks are yours to bear.
Advertisements.
- Now you must download Android SDK from its official website's page and install it. Set it up with downloading platform-tools and also USB drivers package within SDK.
- Or. You can download Fastboot / ADB package based on your OS from the below links to your PC guys.
- Now you need to download twrp-pixel-installer-sailfish-3.0.2-0-RC1.zip to your device's root directory and then power off your Google Pixel XL.
- Now you need to use your USB cable to connect your device to PC.
- Download Twrp-pixel-installer-sailfish-3.0.2-0-RC1.zip to your PC and save the file in the same directory as the Fastboot/ADB package files you extracted on the step1.
- Now enter to the Fastboot / ADB mode pressing the Volume Up + Volume Down + Power till the screen showing the text. That means your on the Bootloader mode.
- Now head to the directory where you put Fastboot (i.e. Step 1) and then do the following; for Windows; Open Command Prompt (Shift + Right-click > Open Command Prompt). For Mac OS X also Linux, utilize the Terminal to head to the directory.
- Now type and execute the command below.
fastboot boot twrp-3.0.2-0-RC1-fastboot-sailfish.img
- Now back to the TWRP main menu then you need to tap the Install button. And then choose the TWRP zip file.
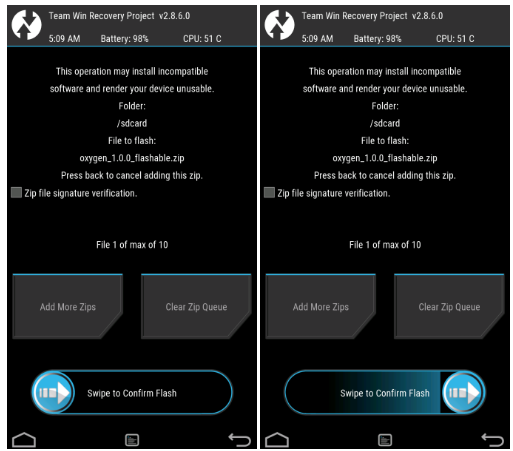
- Now confirm the installation by simply swiping the Swipe to Confirm Flash option. You will see the installation will begin.
- Now you need to tap the Reboot System button.
- Finish.
Congratulation my friend because you have managed to install TWRP 3.0.2 recovery on Google Pixel device. You can now install modified / custom ROM, root your device and doing anything you desire to take your device to the next level. Again congratulation guys. Okey?


No comments:
Post a Comment