The AICP is a stable ROM can run fast, smooth and responsive not to mention it's attentively maintained and updated by the developers therefore it's not too much if I say that you can consider it to be your daily driver if you like it.
Advertisements.
And on this post I would like to guide you through the entire needed processes to install AICP Android 7.1.1 ROM on your Google Nexus 7 (2013).
Preconditions.
- First thing first, backup your data first.
- Be sure that you set your USB debugging mode enabled first. (How to enable USB debugging mode on Android).
- Only apply the guides written on this if your device is Nexus 7 (2013) and back away if yours is not guys.
- Be sure that your Nexus's bootloader is unlocked.
- Firstable to apply the guides from here that your device should already have CWM or TWRP recovery installed. (How to install TWRP recovery on any Android devices).
- Prepare your computer and a USB cable to be used for the zip file transferring.
- AICP doesn't come with Google Apps, therefore you will need to install the Google Apps separately, oke?
- Neither Google nor Asus has anything to do with the AICP ROM, it's the result of the third-party Android team, therefore flashing this ROM will nullify your device's warranty.
- Follow all the guides from this post without skipping any steps.
How to update Nexus 7 (2013) to Android 7.1.1 Nougat AICP ROM
Perform the guides on this post with all the risks are yours to bear.
Advertisements.
- Now you must download Android 7.1.1 AICP ROM and Gapps to the computer of yours.
- Now you need to use your USB cable to connect your device to PC. Once they're connected then transfer all the zip files to your device's SD card.
- Now power off your Nexus 7 (2013) then unplug it from USB cable.
- Now enter to the Recovery Mode / TWRP mode.
- Inside the TWRP mode, perform the following action full data wipe by choosing the Wipe button -> Swipe to Factory Reset button.
- Now back to the TWRP main menu then you need to tap the Install button. And then choose the Android 7.1.1 Nougat AICP ROM zip file you previously transferred to your device's storage on step 2.
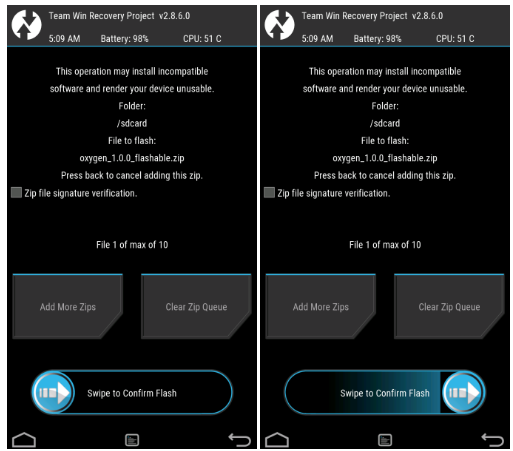
- Now confirm the installation by simply swiping the Swipe to Confirm Flash option. You will see the installation will begin.
- Once the installation has been completed then repeat the above action to flash the Gapps.
- Now you need to tap Wipe cache/dalvik button in case you experience bootloop or other technical problem.
- Now you need to tap the Reboot System button.
- Done.


No comments:
Post a Comment