The situation is of course forcing the third-party developers to work harder to find the possible loop to get root access and modifying the system files.
Advertisements.
And Chainfire had made its way to bring systemless root along with SuperSU last year and it offered users to root their Android device without the need to modify the system partition, as to which can still receives the official and automatic OTA updates on their rooted Android devices.
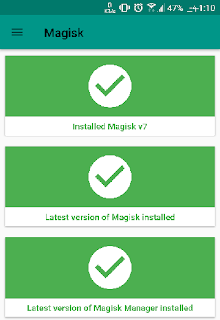
Now we have handed with the new systemless interface that was built on systemless from Chainfire, namely Magisk that is developed and released by topjohnwu from XDA. The Magisk can be used not only to make custom Mod but also to create custom ROMs.
With Magisk you can either create custom MODs and ROMs without modifyin your device's system files. And now I am providing you the instructions in order to walk you through the entire process to flash Magisk Universal Systemless Interface using TWRP recovery image.
Requirements.
A TWRP recovery image. Learn to install TWRP on any Android device.
How to Install Magisk using TWRP Recovery
- Download the Magisk zip v7. file to your device's storage (Suggestion; use your computer to download the zip file then transfer it to your device).
- Now enter to the TWRP recovery mode.
- Once you are on the TWRP recover mode.
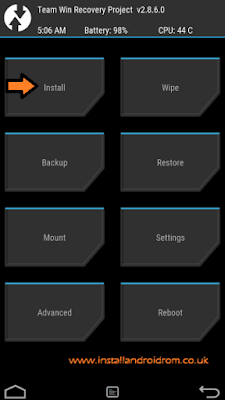
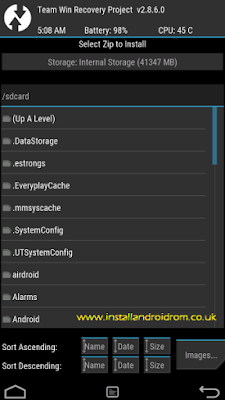
- You need to tap Install button then find the Magisk zip file you previously store your device's storage.
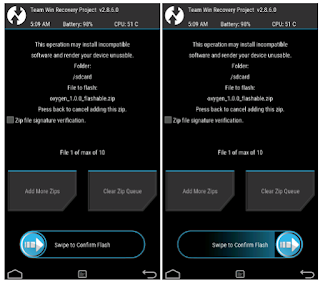
- Once you found it, then select the Magisk zip file, then confirm the installation by swiping the Swipe to Confirm Flash button located on the lower of your screen.
- The flashing process will begin.
- Once they are finish, just reboot your beloved device, using Reboot System now guys.
Advertisements.
Done and congratulations because you have finished following the entire procedures to install Magisk Universal Systemless Inteface on Android using TWRP recovery.
""
How to install Systemless root on Android of yours.
Via XDA forum by topjohnwu.


No comments:
Post a Comment