sMobile ? "width=device-width,initial-scale=1.0,minimum-scale=1.0,maximum-scale=1.0" : "width=1100"' name='viewport'/> android xda: December 2016

Tuesday, 27 December 2016

Download Android AIO Driver

Download Android AIO driver. Hi guys today I would like to inform you about one of the good Android drivers, namely Android AIO driver that you are welcomed to download and install it on your computer. The Android AIO driver comes with complete files you need to make improvements to your Android via computer.

In Android AIO driver you will find the ADB driver, MTK driver to connect your pc to any Mediatek device, Samsung driver and also SPD driver to connect to Spreadtrum device. Of course you will find that useful if you own devices that are supported by the driver.
Advertisements.

And Android AIO driver is free and no need to pay anything just to download and install it on PC.


Download Android AIO Driver


Features of Android AIO driver.
  • ADB driver. With it you can simply connect your computer to any Android device without the need to firstly install PC suite app.
  • Samsung driver. If you own a Samsung Galaxy flagship device then the Android AIO driver can be used to bridge your Samsung device to PC.
  • SPD driver. Connect any of your Spreadtrum device to PC and it's will be detected.
  • MTK driver. Any MTK devices are supported with Android AIO driver to connect to your computer.
See how to install ADB & Fastboot drivers on computer and how to install TWRP on any Android devices.
Advertisements.


I hope you find the download Android AIO driver post useful and tell your friends about this post who know they might need it and see you again.

Install ADB & Fastboot Drivers On Computer Easily

You can learn the fastest way to install ADB & Fastboot on Windows computer, the tutorials written here will elaborate the quickest and easiest way for installing those useful tools to optimize our Android powered device.
Advertisements.

As we know, in the realm of Android we are familiar with the activities like rooting, tweaking and modding our Android OS. Those kind of activities without doubt need the involvements of fasboot (Or mostly).

A little bit about ADB and Fastboot.

Install ADB & Fastboot Drivers On Computer Easily
What is ADB?

ADB means Android Debug Bridge. With this tool you can send Linux or Android commands from computer to connected Android powered smartphones or tablets.

What is Fastboot?

Fastboot is a tool that works in fasboot / bootloader mode. You can perform number of things, for example re-flashing your system partition. To use Fastboot, then your device should already in the bootloader unlocked stage. You can do a manual update using this tool.

I think that's sufficient to figure out what these tools can benefit your Android device. It's time to bring the tools to your Windows computer.

So that's why installing ADB & Fastboot drivers are required. And fortunately it's not a hard task. That's credit should be given to one of the XDA senior memberS namely, Snoop05 who have released a tiny size yet very handful app, ADB Installer for us to use. And it works.
Advertisements.

It's almost an instant process. And will benefit you so big. If you are ready then we can start the flashing process.

But before we explore the tutorials, I recommend you to read the following preconditions, please read them.

Preconditions.
  • A computer Windows.
Features and the details of ADB Installer app.
  • Size only 9.18 MB.
  • Only 15 seconds installation period.
  • AIO - ADB, Fastboot and also Drivers.
  • The installation procedurs are easy -- simply run it then done.
  • Clean. ADB and Google Drivers from latest SDK.

Download ADB Installer setup file by an XDA member @Snoop05


Requirement.
  • Get the ADB installer app from the download links based on the versions of your choice.

Install ADB & Fastboot Drivers On Computer Easily.

Instructions.
  1. Double-click on the ADB-Setup-1.4.2.exe you previously stored on your computer.
    ADB Setup Android
  2. A CMD or command prompt will then appear with blue color.
  3. Just Yes to all the section (Just type Y then enter, that means Yes).
    Install ADB & Fastboot Drivers On Computer
  4. After ADB & Fasboot and Drivers are entirely installed, the command box will close automatically. That means ADB & Fastboot is now running to your system now.
    How to Install ADB and Fastboot on Windows
  5. Finish.
Once you have done it then you can do several unofficial activities such as install TWRP on any Android devices.

Congratulations for your success installing the ADB & Fastboot on your Windows computer.

Monday, 26 December 2016

How To Install TWRP Recovery On Android Via Fastboot Mode

How to install TWRP recovery on Android Via Fastboot mode. Installing TWRP recovery on Android device is important thing that you should have done in order to perform tweaks that will help improving or optimizing your Android powered device.
Advertisements.

TWRP recovery is a non-stock recovery image that offers more technical abilities compared to the stock recovery, surely you have familiars with activities like rooting and custom ROMs. Yes with TWRP you can install SuperSU rooting package and custom ROMs like CynogenMod to your device.

TWRP recovery is one of the most used custom recoveries now days, not only it does exactly the same as the popular CWM recovery, it is more user friendly since it's offering touch screen ability so you don't need to use your device's physical buttons like Power or Volume like other custom recovery environments. With TWRP, all you need just tapping the menu using your fingers and done.

Are you convinced to install TWRP recovery on your Android device? Just follow the full instructions written on this post. You will be correctly guided.
Advertisements.

In this post you will be guided to install TWRP recovery on Android via Fastboot. The process is quite simple. Just keep reading guys.
How To Install TWRP On Android Via Fastboot Mode

But you need to firstly read the following points.
  • Your Android device's bootloader should already be unlocked.
  • You have a working Windows computer.
  • Have installed original USB drivers and a USB cable.
  • You have set Fasboot and ADB to your computer.
  • Make sure you have enabled your Android debugging mode.
Since you have read all the points. You are now recommended to grab the following TWRP recovery image file. Please.

How to install TWRP recovery on Android via Fastboot

  1. You need to install adb and fasboot to your computer.
  2. When done. Put the TWRP img file you downloaded previously to the Adb & Fasboot folder on your PC.
  3. Then launch the command prompt inside the ADB & Fasboot folder, by pressing Shift + Right click on anywhere within the folder, then choose Open Command Window here.
    How To Install TWRP Recovery On Android Via Fastboot Mode
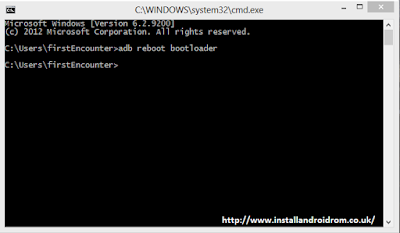
  4. You can connect your Android device to your PC. And then type the command below.
    adb reboot bootloader
    adb reboot bootloader.png
  5. If you are asked for permission just choose OK to Allow USB debugging.
  6. When your Android device is in bootloader mode, just type the command below to install TWRP.img file.
    fastboot flash recovery twrp-2.8.x.x-xxx.img
  7. Change the twrp.img with the name of your TWRP recovery.img, or simply use the twrp.img name.
  8. After the TWRP is fully installed to your Android device, you can reboot it then, just use this command guys.
    fastboot reboot
    Fastboot Reboot
Great! You just finish installing the TWRP recovery on Android via Fastboot mode. Congratulations because you can now carry out a host of major hacks and tweaks, from creating a full backups to flashing awesome custom ROMs.

Download OxygenOS 3.5.5 OTA For OnePlus 2

Download OxygenOS 3.5.5 OTA for OnePlus 2. OnePlus 2 receives an update now, the stock firmware released recently for the phone is OxygenOS 3.5.5 OTA and it brings the most anticipated features which is a feature to enable VoLTE functionality. And the absence of this wonderful feature was a big disappointment when the phone was initially released at July, 2105!

For some people without VoLTE functionality is a pain in the back since with that feature we can force to have 4G LTE network only when doing voice call. Since then people put their head together to bring a tweak for enabling VoLTE on OnePlus 2.
Advertisements.

But now OxygenOS 3.5.5 was introduced this week includes VoLTE enabler functionality for us. However the feature can be used only on the select carriers. That means not all carriers can enjoy this feature.

Beside VoLTE, OxygenOS 3.5.5 is also armed with app lock, battery saving mode, gaming mode and other wonderful features. If you want to see the whole logs that are added with this stock ROM. Then you can read the change log list.

See the list.

Change logs.
  • Enabled VoLTE functionality for select carriers.
  • Added App Lock.
  • Added Battery Saving Mode ( Settings > Battery > More ).
  • Added Gaming Mode ( Settings > Developer Options ).
  • Added Additional Options for the Alert Slider.
  • Redesign of the Volume Adjustment Bar.
  • Shelf Optimizations.
  • Updated OxygenOS UI.
  • Updated Interface and UI of the Clock app.
  • Updated Android Security Patch Level to 1/12/16.
  • Increased System Stability.
  • General Bug Fixes.
Download OxygenOS 3.5.5 OTA for OnePlus 2

Download OxygenOS 3.5.5 OTA for OnePlus 2


How to install OxygenOS 3.5.5 OTA on OnePlus 2?

Make sure you have made backups before proceeding.
Advertisements.


  1. Now you need to firstly setup ADB and fastboot on your PC.
  2. Download the OTA zip file of the OxygenOS 3.5.5 then change the file into the ota.zip.
  3. You need to enable your OnePlus 2 USB debugging mode.
  4. You need to connect your OnePlus 2 to computer.
  5. Now on your PC, head to the folder where you stored OTA.zip then right-click + shit to open command prompt window here.
    ADB Open Command Window Here VoLTE
  6. On the command window box just execute this command to boot your device into the recovery mode.
    adb reboot recovery
    How to install OxygenOS 3.5.5 OTA on OnePlus 2 recovery
  7. On the recovery mode, just choose the “Install from USB” option.
  8. Then type the command below.
    adb sideload ota.zip
    How to install OxygenOS 3.5.5 OTA on OnePlus 2
  9. The flashing process will then begin just wait till the whole procedures to complete. 
  10. If they are finish just reboot your device from the reboot option available on the recovery menu.
Well done guys because you have successfully installed OxygenOS 3.5.5 on OnePlus 2.

Sunday, 25 December 2016

How To Unlock Bootloader Of Google Pixel / Pixel XL

Perhaps this news is a bit late, but it's better than not sharing it, you will be guided to unlock bootloader of Google Pixel and Pixel XL. These two phones are considered new, released this year as phones by Google and have everything you can expect from Google to always pour their best abilities to provide as the best and the best Android powered device. Just like we expect the phones indeed meet all our expectations.

If you one of the lucky guys who have bought either Google Pixel or Pixel XL, then you probably want to increase your device's performance to higher stage, like rooting it or installing tweaks that you need most. But before you think about doing those unofficial development. Then you need to firstly unlock bootloader your Google Pixel and Pixel XL.
Advertisements.

And you are in luck because you will be guided completely to unlock the bootloader of your Google Pixel and Pixel XL from this post. And be ready for that. But beforehand then I would like you to firstly read the preconditions because they are important.
How To Unlock Bootloader Of Google Pixel / Pixel XL

Preconditions.
  • The tutorials on this post only work on the Google Pixel or Pixel XL you bought from Google's official website not from third party networks seller such as Verizon. I again I remind you that do not apply this post if your device was bought from Verizon, or any such networks.
  • Enable your device's USB debugging mode first by heading to Settings -> About Phone -> Tap for 7 times on build number. Then back to Settings, there you will find the Developer Options. Open that option and find the USB Debugging and enable that option. (Or learn it from how to enable USB debugging mode on Android).
  • A Windows computer and a USB cable.
  • Then install ADB drivers and ADB tool on your PC.
  • Charge your device's battery power if it's less power.
  • Backup all data you regard important.
  • Good luck guys to follow the unlocking instructions from this post.

How to unlock bootloader of Google Pixel and Pixel XL

Perform the guides to unlock your Google Pixel / Pixel XL bootloader below at your own risks.
Advertisements.

  1. Now connect your Google Pixel or Pixel XL to your computer (Make sure you have enabled USB debugging of your Google Pixel / Pixel XL).
  2. Then download minimal ADB then open that tool.
    How to unlock bootloader of Google Pixel and Pixel XL
  3. Make a check first guys, to see whether everything works, by typing the adb device command.
    Unlock bootloader of Google Pixel and Pixel XL
  4. If there is a popup showing up on your device's screen then click OK, Just like on the above picture guys.
    Allow USB Debugging
  5. Now to unlock your bootloader of your Google Pixel and Google Pixel XL, just type this command; fastboot oem unlock. A warning message will show up. Just hit Yes.
    How to unlock bootloader of Google Pixel and Pixel XL
  6. The action will lead your device to the factory reset. Just wait guys. Once done your Google Pixel / Pixel XL's bootloader is unlocked now. And the procedures are quite simple. Right. Therefore you should be happy.
  7. Reboot your device now by using and typing this command; fastboot reboot.
Now you do the following activities.
Congratulations because you have successfully unlocked bootloader of your Google Pixel and Google Pixel XL. And if you have any questions regarding the Google Pixel and Pixel XL bootloader unlocking tutorials above. Then do not be a shy person to reveal them on the provided comment area. And I hope you find this post useful. And see you again on my next posts.

Friday, 23 December 2016

How To Update Sony Xperia Z5 To Android 7.0 Nougat With CM14.1 ROM

How to update Sony Xperia Z5 to Android 7.0 Nougat with CM14.1 ROM. Hi guys, do you own a Sony Xperia Z5 and want to update it to Android 7.0 Nougat? Then I invite you to follow the full instructions to install Android 7.0 Nougat CM14.1 on your Sony Xperia Z5. And the steps to flashing the custom ROM is quite easy, all you need is having a custom recovery.

And CM14.1 ROM is one of the few best Android 7.0 Nougat based custom ROMs, you will enjoy the fastness, stability and also the ROM is so smooth once it's installed on your Sony Xperia Z5. And of course you will also enjoy the features from it.
Advertisements.

If you want to update your Sony Xperia Z5 to Android 7.0 Nougat then you can follow the full instructions from this post. And as the result your Sony Xperia Z5 device will be running on the Android 7.0 software.

How To Update Sony Xperia Z5 To Android 7.0 Nougat With CM14.1 ROM
Preconditions.
  • I must remind you to only flash the CM14.1 ROM on Sony Xperia Z5, do not flash it on any other Xperia models, okey?
  • Since the CM14.1 Nougat ROM is based on AOSP then you need to firstly unlock your device's bootloader. Therefore learn to unlock bootloader of Sony Xperia device. If you haven't done so guys.
  • Be sure to firstly make necessary backups before starting the guides from this post.
  • Your device's should already have either CWM or TWRP recovery installed. Visit this page; how to install TWRP on any Android device, if you haven't flashed the custom recovery.
  • One more thing you need to firstly enable USB debugging mode if you haven't done so.
  • Remember that you need to follow all the steps written on this post and do not skip anything.
  • CM14.1 Android 7.0 Nougat doesn't come with the Google Apps therefore you will need to install the Gapps zip file separately after you have finished installing the CM14.1 Nougat ROM.
  • Prepare your computer to download the zip files and a USB cable to transfer the zip files to your device's SD storage.
  • Check your device's battery power, if it's less power, then charge it.
  • I wish you all the best guys.

You need to download the following files to your computer.


How to update Sony Xperia Z5 to Android 7.0 Nougat with CM14.1 custom ROM

Well guys follow the updating instructions and all the possible risks are yours to bear and nobody should be taken responsible if anything wrong happen to your device such as brick.
Advertisements.

  1. Now connect your Sony Xperia Z5 to computer using a USB cable and then transfer all the zip files (CM14.1 ROM and Google Apps) you downloaded earlier to PC to your Nexus's SD card.
  2. Now power off your Sony Xperia Z5 then unplug it from USB cable.
  3. Now enter to the Recovery Mode / TWRP mode.
  4. Inside the TWRP mode, perform the following action full data wipe by choosing the Wipe button -> Swipe to Factory Reset button.
    Wipe Data TWRP Recovery Android
    Wipe TWRP Recovery
  5. Now back to the TWRP main menu then you need to tap the Install button. And then choose the Android 7.0 Nougat CM14.1 ROM zip file you previously transferred to your device's storage on step 2.
    Install Button TWRP Recovery Android
    Choose Zip File TWRP Recovery
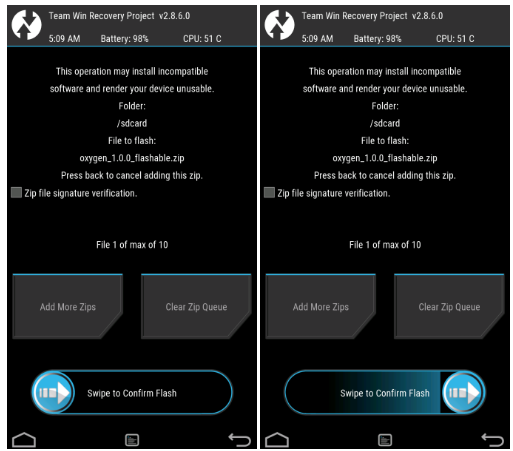
  6. Now confirm the installation by simply swiping the Swipe to Confirm Flash option. You will see the installation will begin.
    Swipe To Confirm
  7. Once the installation has been completed then repeat the above action to flash the Gapps.
    TWRP Finished Install
  8. Now you need to tap Wipe cache/dalvik button in case you experience bootloop or other technical problem.
  9. Now you need to tap the Reboot System button.
    TWRP Reboot System
  10. Done.
You did it my friend because you have successfully updated your Sony Xperia Z5 to Android 7.0 Nougat with CM14.1 ROM and see you again guys.

Tuesday, 20 December 2016

Download & Install Gapps For CM14 / CM14.1 Android 7 Nougat

Download & install Gapps for CM14 / CM14.1 Android 7 Nougat. Guys today I would like to share the information about Gapps for CM14 or CM14.1 ROM, so if you are using either CM14 or CM14.1 then you should also install the Gapps as well. Without doing so then you will not have all the apps officially from Google that are very important.

Google app or Gapps is containing all the applications that are officially developed, maintained and released by Google. The apps like Gmail, Google Play Store, Calender, Google+ and so on are the apps we use daily on our Android based device. Without them our Android doesn't look like one.
Advertisements.

And currently the custom ROM such as CM or CyanogenMod doesn't include the Gapps, therefore during our effort to flash the custom ROM, we are required to also flash the Gapps separately. And that's the requirement we can avoid. On this post I share to you the download links of Gapps for CM14 and CM14.1 custom ROM. Those who are searching these kind of applications can come to this page now.

CM14 and newer are based on the Android 7 Nougat, therefore all the apps from Google must be supporting the Nougat. Therefore you need to update your existing apps to the latest ones. And do not worry you can get them all here.

Alright before begin, I would like you to read the additional information, please.
Download & Install Gapps For CM14 / CM14.1 Android 7 Nougat

Preconditions.
  • Your device must already have CM14 or CM14.1 installed.
  • Your device should already have either CWM or TWRP recovery installed. Learn to install TWRP recovery on Android.
  • Make backup first.

Download Gapps for CM14 or CM14.1 ROM.


How to install Gapps on any Android device?

Follow the instructions and all the risks are yours to bear.
Advertisements.


  1. Once you've downloaded the Gapps on your PC, then connect your PC to your Android phone or tablet guys using the USB cable. Then transfer the zip file of Gapps for CM14 or CM14.1 Nougat to your device's SD card.
  2. Turn off your Android device, then disconnect it from USB cable, do it now.
  3. Boot your device into the Recovery Mode / TWRP Mode using the keys combinations set by your device's manufacturer.
  4. Inside the TWRP main menu find and tap the Install button. Then find the Gapps for CM14 or CM14.1 Nougat zip file you transferred earlier to your Android device's SD card.
    Install Button TWRP Recovery Android
    Choose Zip File TWRP Recovery
  5. Confirm the installation by swiping the Swipe to Confirm Flash button then the installation process will be started now.
    Swipe To Confirm
  6. After it's finish, you will see something like this on your screen, see.
    TWRP Finished Install
  7. You can reboot your device now using the Reboot System button.
    TWRP Reboot System
  8. Finish.
Well done you have successfully installed the Gapps for CM14 / CM14.1 Android 7 Nougat. Congratulation. See you again.

Saturday, 17 December 2016

How To Install TWRP Recovery On Google Pixel

How to install TWRP Recovery on Google Pixel. Now I would like to invite you to follow the guides to install TWRP on Google Pixel device. As we know that all the benefits your device will get once it's powered with a custom recovery such as TWRP.

TWRP is offering the more and bigger abilities that the stock recovery is unable, you can perform the whole backups to your device, you can root your device by flashing the zip file of rooting package, you can also install all the great modified ROM such as CM, AOSP, AICP, crDroid and more.
Advertisements.

If you are interested then you can proceed to the tutorials to deliver the TWRP recovery on your Google Pixel device. Anyway the TWRP here is in 3.0.2 version. It's the newest one comes with several awesome things.

How To Install TWRP Recovery On Google Pixel
Preconditions.
  • Of course you will need to firstly make necessary backups over all the data you regard important.
  • Do not forget to enable your USB debugging mode. (How to enable USB debugging mode on Android).
  • Follow the online tuition from here only if your device is Google Pixel guys.
  • Be sure that your Google Pixel's bootloader is already unlocked to perform the guides from here. Learn the full instructions on how to unlock bootloader of Google Pixel and Pixel XL.
  • Prepare everything needed, what's that? Your computer and a USB cable.
  • Do not skip any steps just follow them all entirely.

How to install TWRP 3.0.2 recovery on Google Pixel

Perform the instructions from this post but all the possible risks are yours to bear.
Advertisements.

  1. Now you must download Android SDK from its official website's page and install it. Set it up with downloading platform-tools and also USB drivers package within SDK.
  2. Or. You can download Fastboot / ADB package based on your OS from the below links to your PC guys.
  3. Now you need to download twrp-pixel-installer-sailfish-3.0.2-0-RC1.zip to your device's root directory and then power off your Google Pixel XL.
  4. Now you need to use your USB cable to connect your device to PC.
  5. Download Twrp-pixel-installer-sailfish-3.0.2-0-RC1.zip to your PC and save the file in the same directory as the Fastboot/ADB package files you extracted on the step1.
  6. Now enter to the Fastboot / ADB mode pressing the Volume Up + Volume Down + Power till the screen showing the text. That means your on the Bootloader mode.
  7. Now head to the directory where you put Fastboot (i.e. Step 1) and then do the following; for Windows; Open Command Prompt (Shift + Right-click > Open Command Prompt). For Mac OS X also Linux, utilize the Terminal to head to the directory.
  8. Now type and execute the command below.
    fastboot boot twrp-3.0.2-0-RC1-fastboot-sailfish.img
  9. Now back to the TWRP main menu then you need to tap the Install button. And then choose the TWRP zip file.
    Install Button TWRP Recovery Android
  10. Now confirm the installation by simply swiping the Swipe to Confirm Flash option. You will see the installation will begin.
    Swipe To Confirm
  11. Now you need to tap the Reboot System button.
    TWRP Reboot System
  12. Finish.
See also how to install TWRP on Google Pixel XL device.

Congratulation my friend because you have managed to install TWRP 3.0.2 recovery on Google Pixel device. You can now install modified / custom ROM, root your device and doing anything you desire to take your device to the next level. Again congratulation guys. Okey?

How To Update Nexus 7 (2013) To Android 7.1.1 Nougat With AICP ROM

How to update Nexus 7 (2013) to Android 7.1.1 Nougat with AICP ROM. The Google Nexus 7 (2013) gets another option to bring the Android 7.1.1 Nougat after Android Ice Cold Project team released an update AICP that comes with modified Android 7.1.1 Nougat. The ROM is armed with several great things such as FC Notification Disabler and many more for you to use.

The AICP is a stable ROM can run fast, smooth and responsive not to mention it's attentively maintained and updated by the developers therefore it's not too much if I say that you can consider it to be your daily driver if you like it.
Advertisements.

And on this post I would like to guide you through the entire needed processes to install AICP Android 7.1.1 ROM on your Google Nexus 7 (2013).

Preconditions.
  • First thing first, backup your data first.
  • Be sure that you set your USB debugging mode enabled first. (How to enable USB debugging mode on Android).
  • Only apply the guides written on this if your device is Nexus 7 (2013) and back away if yours is not guys.
  • Be sure that your Nexus's bootloader is unlocked.
  • Firstable to apply the guides from here that your device should already have CWM or TWRP recovery installed. (How to install TWRP recovery on any Android devices).
  • Prepare your computer and a USB cable to be used for the zip file transferring.
  • AICP doesn't come with Google Apps, therefore you will need to install the Google Apps separately, oke?
  • Neither Google nor Asus has anything to do with the AICP ROM, it's the result of the third-party Android team, therefore flashing this ROM will nullify your device's warranty.
  • Follow all the guides from this post without skipping any steps.

How to update Nexus 7 (2013) to Android 7.1.1 Nougat AICP ROM

Perform the guides on this post with all the risks are yours to bear.
Advertisements.

  1. Now you must download Android 7.1.1 AICP ROM and Gapps to the computer of yours.
  2. Now you need to use your USB cable to connect your device to PC. Once they're connected then transfer all the zip files to your device's SD card.
  3. Now power off your Nexus 7 (2013) then unplug it from USB cable.
  4. Now enter to the Recovery Mode / TWRP mode.
  5. Inside the TWRP mode, perform the following action full data wipe by choosing the Wipe button -> Swipe to Factory Reset button.
    Wipe Data TWRP Recovery Android
    Wipe TWRP Recovery
  6. Now back to the TWRP main menu then you need to tap the Install button. And then choose the Android 7.1.1 Nougat AICP ROM zip file you previously transferred to your device's storage on step 2.
    Install Button TWRP Recovery Android
    Choose Zip File TWRP Recovery
  7. Now confirm the installation by simply swiping the Swipe to Confirm Flash option. You will see the installation will begin.
    Swipe To Confirm
  8. Once the installation has been completed then repeat the above action to flash the Gapps.
    TWRP Finished Install
  9. Now you need to tap Wipe cache/dalvik button in case you experience bootloop or other technical problem.
  10. Now you need to tap the Reboot System button.
    TWRP Reboot System
  11. Done.
Well done my friend because you have fully installed AICP Android 7.1.1 Nougat ROM on Nexus 7 (2013) device therefore you can verify it by going to the Settings -> About -> To find out what is the ROM running on your device right now.

Friday, 16 December 2016

How To Install TWRP On Google Pixel XL

Here is the guide to install TWRP on Google Pixel XL. It is the TWRP recovery version 3.0.2 that you can flash on your beloved and shiny Google Pixel XL. Those who own the said device can come here and follow all the needed instructions to bring the TWRP 3.0.2 recovery on Google Pixel XL. And you will be thankful for doing so.

With TWRP recovery installed on your Google Pixel XL, then you can flash the custom ROMs, root your device, install Kernel and tweaks to lift up your device's performance to the level of your dream. And remember, doing so will effect of losing your device's warranty, that's the unavoidable consequence. Therefore perform at your own risk. Okey?
Advertisements.

But considering the benefits you will enjoy after having the TWRP recovery powering your Google Pixel XL, I guess losing the warranty will not be a big thing for you guys.

How To Install TWRP On Google Pixel XL
Preconditions.
  • I recommend you to firstly backup all your data.
  • Be sure that you firstly enable your USB debugging mode. (How to enable USB debugging mode on Android). Okey??
  • Remember to only apply the guides written here if your device is Google Pixel XL.
  • Make sure that your device's bootloader is already unlocked. Or you can learn on how to unlock bootloader of Google Pixel and Pixel XL.
  • I believe you will need a computer and a USB cable.
  • Follow all the instructions written on this post and do not skip anything.

How to install TWRP 3.0.2 recovery on Google Pixel XL

Perform the instructions from this post but all the possible risks are yours to bear.
Advertisements.

  1. Now you must download Android SDK from its official website's page and install it. Set it up with downloading platform-tools and also USB drivers package within SDK.
  2. Or. You can download Fastboot / ADB package based on your OS from the below links to your PC guys.
  3. Now you need to download twrp-pixel-installer-marlin-3.0.2-0-RC1.zip to your device's root directory and then power off your Google Pixel XL.
  4. Now you need to use your USB cable to connect your device to PC.
  5. Download TWRP (twrp-3.0.2-0-RC1-fastboot-marlin.img to your PC and save the file in the same directory as the Fastboot/ADB package files you extracted on the step1.
  6. Now enter to the Fastboot / ADB mode pressing the Volume Up + Volume Down + Power till the screen showing the text. That means your on the Bootloader mode.
  7. Now head to the directory where you put Fastboot (i.e. Step 1) and then do the following; for Windows; Open Command Prompt (Shift + Right-click > Open Command Prompt). For Mac OS X also Linux, utilize the Terminal to head to the directory.
  8. Now type and execute the command below.
    fast boot twrp-3.0.2-0-RC1-fastboot-marlin.img
  9. Now back to the TWRP main menu then you need to tap the Install button. And then choose the TWRP zip file.
    Install Button TWRP Recovery Android
  10. Now confirm the installation by simply swiping the Swipe to Confirm Flash option. You will see the installation will begin.
    Swipe To Confirm
  11. Now you need to tap the Reboot System button.
    TWRP Reboot System
  12. Finish.
Do not forget to also learn about how to install TWRP on Google Pixel device.

Well done my friend because you have successfully flashed the TWRP 3.0.2 recovery on Google Pixel XL and enjoy guys.

Wednesday, 7 December 2016

How To Update Galaxy S3 To Android 7.0 Nougat Using CM14.1 ROM

Update Galaxy S3 to Android 7.0 Nougat using CM14.1 ROM. The International Samsung Galaxy S3 is without a doubt, a great smartphone because it was armed with so many stuff that can assist us to undergo our daily live. Because of that, the phone is not left behind by the third-party developers, because it's regarded can handle a tough Android version such as Android 7.0.

Recently we are handed with a news that people behind the CyanogenMod team had released a CM14.1 to deliver the modified Android 7.0 Nougat to Samsung Galaxy S3, and the zip file of the ROM is currently available for any Samsung Galaxy S3's users to download and install for their need.
Advertisements.

However, it's still not yet in the final stage, therefore don't expect it will 100% stable once it's fully installed on your device and some new features of ROM are not included yet. But it's an official nightly build therefore you will get the upcoming OTA updates daily.

How To Update Galaxy S3 To Android 7.0 Nougat Using CM14.1 ROM
Preconditions.
  • You need to firstly backup your precious data before starting.
  • Make sure that you already have USB debugging mode enabled. (How to enable USB debugging mode on Android).
  • Make sure that your device is International Samsung Galaxy S3 and do not apply the guides written here on any other models.
  • Your device should already in the unlocked bootloader condition.
  • Be sure that you already have installed either CWM or TWRP recovery software on your Samsung Galaxy S3. (How to install TWRP recovery on any Android devices).
  • A computer and a USB cable are needed to perform the guides from this post.
  • Do not forget to follow the CM14.1 flashing instructions on this post as whole and not to skip any steps.

How to update International Samsung Galaxy S3 to Android 7.0 Nougat with CM14.1 ROM

Follow the guides from this post at your choice, blame none but yourself, if you brick or damage your device..
Advertisements.

  1. Now you must download Android 7.1 CM14.1 ROM and Gapps to the computer of yours.
  2. Now you need to use your USB cable to connect your device to PC. Once they're connected then transfer all the zip files to your device's SD card.
  3. Now power off your Samsung Galaxy S3 then unplug it from USB cable.
  4. Now enter to the Recovery Mode / TWRP mode.
  5. Inside the TWRP mode, perform the following action full data wipe by choosing the Wipe button -> Swipe to Factory Reset button.
    Wipe Data TWRP Recovery Android
    Wipe TWRP Recovery
  6. Now back to the TWRP main menu then you need to tap the Install button. And then choose the Android 7.0 CM14.1 Nougat ROM zip file you previously transferred to your device's storage on step 2.
    Install Button TWRP Recovery Android
    Choose Zip File TWRP Recovery
  7. Now confirm the installation by simply swiping the Swipe to Confirm Flash option. You will see the installation will begin.
    Swipe To Confirm
  8. Once the installation has been completed then repeat the above action to flash the Gapps.
    TWRP Finished Install
  9. Now you need to tap Wipe cache/dalvik button in case you experience bootloop or other technical problem.
  10. Now you need to tap the Reboot System button.
    TWRP Reboot System
  11. Done.
You did it my friend because you have updated your Samsung Galaxy S3 to Android 7.0 Nougat using the CM14.1 ROM and now you can enjoy everything that the CM14.1 ROM is offering for you.