Advertisements.
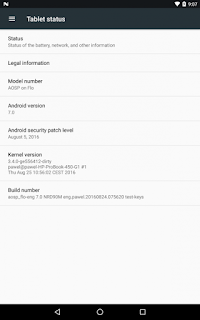
Anyway this AOSP ROM is still under development though, therefore you can expect some bugs. One of the bugs reported is 1080p video doesn't perform well. But in overall AOSP Android 7.0 Nougat ROM is great and can be used as your daily ROM.
And if you want give this ROM a try then you are invited to continue reading this post to follow the flashing instructions.
Preconditions.
- AOSP is not a stock ROM, you need to have a bootloader unlocked device to flash it.
- Your device should already be powered with a custom recovery images such as CWM, TWRP, etc. On this post we use CWM recovery.
- Root access is needed.
- Installing this kind of ROM will effect of losing your device's warranty.
- AOSP ROM doesn't come with Google Apps therefore you need to flash this ROM separately.
- Your device's USB debugging mode should be firstly enabled.
- Create backups before starting anything.
- Prepare your computer, a USB cable as we will need to connect your device to PC.
- Charge your device's batter power if it is low.
- Download Android 7.0 AOSP ROM.
- Google Apps.
How To Flash AOSP Android 7.0 ROM On Nexus 7 (2013).
- Now transfer all the zip files you previously downloaded to PC to your Nexus 7 by connecting your device to PC using your USB cable.
- After all the zip files transferred, just disconnect your device from PC.
- We will need to boot into the CWM recovery by firstly powering off your device, then press these buttons; Volume UP + Home + Power.
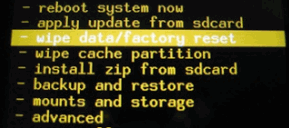
- Inside the CWM recovery just choose this option; Wipe Data/Factory Reset.
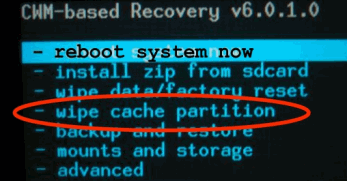
- Then select the Wipe Cache Partition. Followed with selecting the Wipe Dalvik Cache.
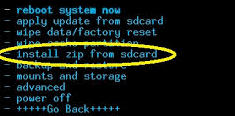
- Now choose the Install Zip From SD Card -> Choose Zip From SD Card to search the ROM zip file and then install the zip file.
- Just choose the *****Go Back***** -> Reboot System Now once the zip file was successfully installed.
- Repeat the above process to flash the Google Apps.
- Once done just restart your device.
Advertisements.
You can now enjoy all the good things offered by AOSP Android 7.0 Nougat ROM on your Nexus 7 (2013).


No comments:
Post a Comment