Advertisements.
All you need is simply flashing the SuperSU 2.78 SR2 via fastboot commands to further root your device. This new SuperSU comes with systemless root. That means you can perform some modifications through boot image only instead via system partition.
With that any users who rooted their Google Pixel and Pixel XL get superuser access without the need to change anything in system partition and able to toggle dm-verity. So in case you encounter any bootloop, you can fix that by installing the stock 'boot.img' via factory image on your device.
Preparations.
- Be sure that your Google Pixel or Pixel XL is already in bootloader unlocked condition. In case your device is Verizon network then you can unlock it using dePixel8tool. Or if you bought it from Google's official website then please head to how to unlock bootloader of Google Pixel and Pixel XL.
- Now download the boot-to-root SuperSU image file then extract the file to get the get boot-to-root.img.
- Google Pixel (all variants); root-sailfish-pixel.zip.
- Google Pixel XL (all variants); root-marlin-pixelxl.zip.
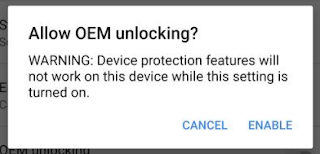
- Now head to Settings> About phone> Build number, then tap it for 7 times in order to enable the Developer Option. Then go back to Settings -> Developer Options to enable USB debugging mode and OEM unlocking.
- Then download and install Minimal ADB and Fastboot driver on your PC.
- Don't forget to backup all the data you regard important.
- Charge your battery power if it's considered less.
Advertisements.
How to root Google Pixel and Pixel XL
- Now power off your Google Pixel or Pixel X to boot into the Bootloader Mode. Do so by pressing and holding the Volume Down + Power buttons for about 3 seconds.
- Now connect your device to PC with a USB cable.
- Now on your PC. head to the ADB and fastboot directory. Since you already installed the Minimal ADB Fastboot setup, head to the directory you installed it, then go to the folder.
- Now copy and paste the boot-to-root.img file to this folder.
- Open command window now / cmd and then type and execute this command; fastboot flashing unlock.
- Follow all the on-screen instruction on your Google Pixel and Pixel XL.
- Now execute this command; fastboot oem unlock.
- Your phone is now unlocked, reboot your device to the Bootloader mode for one more time then execute this command on the CMD; fastboot boot boot-to-root.img.
- The above action will install the boot-to-root image file on your Google Pixel or Pixel XL. The flashing processes will take several minutes. And during that your device will perform 2 times of rebooting. Therefore just wait.
- After your device is on again, then it has now be rooted, your device has full root access now.
Well done because you have successfully rooted your Google Pixel and Pixel XL with SuperSU systemless then you use root checker to verify it.

No comments:
Post a Comment