Advertisements.
And CM14.1 is not the only custom ROM to serve the device with Nougat, but there are others too, and on this blog I have previously shared the tutorials to update Nexus 7 (2013) and you can read the instructions from this page and from this page.
Back to the main topic, you can follow the flashing processes by the instructions written here, but remember that doing so will require you to unlock bootloader and install a csutom ROM, on this post I use TWRP. As the result your device's warranty will be nullified. So all the risks are your to face!
How to update Asus Nexus 7 (2013) to Android 7.1 Nougat with CM14.1 Custom ROM Tutorials
Your warranty will be voided. Perform the guides written on the post and all the risks are yours to take.
Advertisements.
- Download CM14.1.zip and Gapps to your PC.
- Now you need to use your USB cable to connect your device to PC. Once they're connected then transfer all the zip files to your device's SD card.
- Now power off your Asus Nexus 7 (2013) then unplug it from USB cable.
- Now enter to the Recovery Mode / TWRP mode.
- Inside the TWRP mode, perform the following action full data wipe by choosing the Wipe button -> Swipe to Factory Reset button.
- Now back to the TWRP main menu then you need to tap the Install button. And then choose the ROM zip file you previously transferred to your device's storage on step 2.
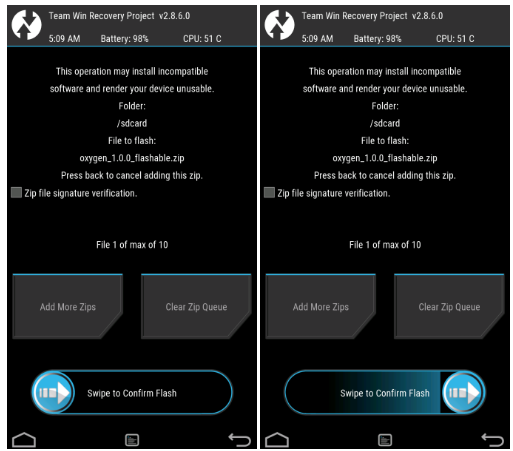
- Now confirm the installation by simply swiping the Swipe to Confirm Flash option. You will see the installation will begin.
- Once the installation has been completed then repeat the above action to flash the Gapps.
- Now you need to tap Wipe cache/dalvik button in case you experience bootloop or other technical problem.
- Now you need to tap the Reboot System button.
- Done.


No comments:
Post a Comment