Advertisements.
The custom ROM I am talking about is XenonHD, it's amazing software that is widely popular among Android users. And it's offering many amazing features aside from its stable and fast performance.
And this post contains all the needed steps to update Nexus 4 to Android 7.1 Nougat software. And to do that you will need to install XenonHD that comes with the Android 7.1 software. However, your device should already have either CWM or TWRP installed.
Preconditions.
- Your device bootloader should already be unlocked.
- Your device should already have CWM or TWRP recovery installed.
- Backup all data you regard important.
- Enable USB debugging mode first before beginning.
- You need to follow all the steps without skipping even one step.
- Charge your Nexus 4 device battery power if it's not enough.
- Gapps are not included on this ROM therefore you will need to install them separately.
How to update Nexus 4 to Android 7.1 Nougat using XenonHD custom ROM
Follow the instructions written on this post but all the possible risks are yours to bear.
Advertisements.
- Now use your USB cable to connect your Google Nexus 4 to computer.
- When the devices are connected then you need to transfer the files to computer.
- After that you must disconnect your phone from computer.
- Turn off your smartphone then turn it on again to boot into the CWM recovery.
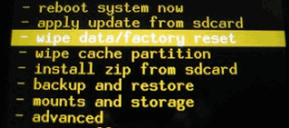
- Within CWM recovery then you need to select the Wipe Data/Factory Reset.
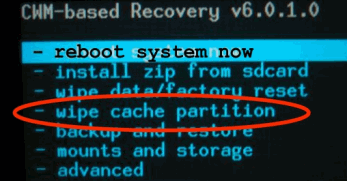
- After that, you must choose the Wipe Cache Partition. Continue your step by selecting the Wipe Dalvik Cache.
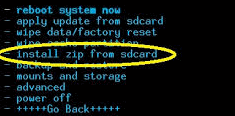
- And then choose the Install Zip From SD Card -> Choose Zip From SD Card to further search the XenonHD Android 7.1 Nougat ROM on your smartphone.
- Now back to the main menu then choose the *****Go Back***** -> Reboot System Now.
- Reboot the phone.
- Done.


No comments:
Post a Comment