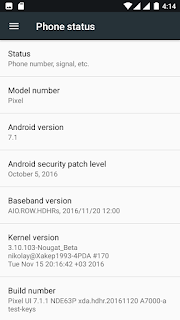
As I mentioned on the first paragraph that the ROM is a custom one, that means it's not officially released by Lenovo, instead it's the result from the third-party Android developer's project, normally manufactures discourage of installing this kind of software -- Including the Lonovo -- but it's proven safe.
Advertisements.
So if you wish to have the Android 7.0 Nougat software running on your Lenovo A7000 then you are invited to learn the full instructions to do so. And you need to already have the CWM or TWRP recovery installed to proceed guys.
Preconditions and information.
- Your Lenovo A7000 bootloader should already been unlocked.
- Remember that to flashing the ROM zip file your device's should have either CWM or TWRP therefore learn on how to install TWRP recovery on Android.
- Your computer and a USB cable must work already.
- Be sure that your Lenovo A7000 USB debugging mode should already be enabled.
- Charge your device's battery if it's less.
- Your device's warranty will be nullified for flashing this non-stock ROM.
- Pixel UI based on Nougat AOSP ROM doesn't come with Gapps, in that case you need to flash the Gapps separately.
- Make backup before beginning to do unofficial thing to your device.
- All the guides written on this post must be followed entirely and don't skip any steps.
- Make the UI as same as possible to Google Pixel.
- Google Assistant Available.
- Core Clock up to 2.00GHz.
- Pre-GAPPS.
- Substratum theme supported.
- And Lot Of It xD.
How to update Lenovo A7000 to Android 7.1 Nougat with Slim7 ROM Tutorials
Your warranty will be voided. Perform the guides written on the post and all the risks are yours to take.
Advertisements.
- Download Pixel UI Based On Nougat AOSP.zip and Gapps to your PC.
- Now you need to use your USB cable to connect your device to PC. Once they're connected then transfer all the zip files to your device's SD card.
- Now power off your Lenovoe A7000 then unplug it from USB cable.
- Now enter to the Recovery Mode / TWRP mode.
- Inside the TWRP mode, perform the following action full data wipe by choosing the Wipe button -> Swipe to Factory Reset button.
- Now back to the TWRP main menu then you need to tap the Install button. And then choose the ROM zip file you previously transferred to your device's storage on step 2.
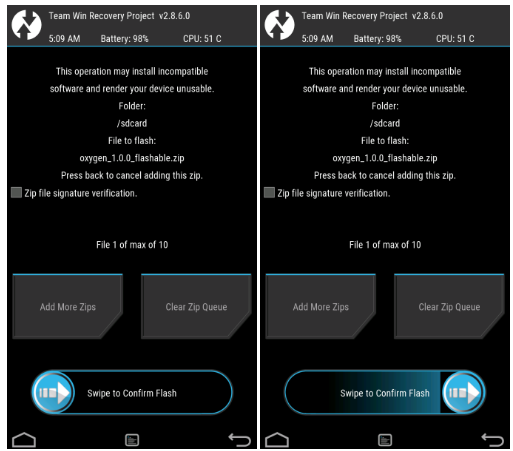
- Now confirm the installation by simply swiping the Swipe to Confirm Flash option. You will see the installation will begin.
- Once the installation has been completed then repeat the above action to flash the Gapps.
- Now you need to tap Wipe cache/dalvik button in case you experience bootloop or other technical problem.
- Now you need to tap the Reboot System button.
- Done.


No comments:
Post a Comment